Table of Contents
Imagine one of your contractors usually does not need access to your AWS S3 buckets (or only access to buckets in your dev environment, but not in prod – you get the idea). Following the principle of least privilege, the contractor’s AWS account is hence not allowed to access these buckets.
Now, for a specific task, access to S3 buckets is needed for a limited amount of time. This can be accomplished in different ways, among others:
- You could of course create an account for your contractor in your own AWS environment and somehow share the (long-term) credentials.
- The recommended way is however to somehow create temporary credentials that can be obtained by trusted entities without the need to share them explicitly.
The second approach can be achieved by using AWS Security Token Service (STS). It is part of AWS Identity and Access Management (IAM) and can be used free of charge. You will not see it in your AWS GUI, but programmatic access will be required (or your contractor can use a URL that you provide him with). A little bit further below I will show how this is done.
Advantages of using AWS STS
Why is the usage of STS recommended and what are the advantages?
- You do not have to specifically create an own account for your contractor
- No need to share long-term credentials explicitly
- Complies with the AWS best practice of regular credential rotation, because whenever STS comes into play, it will generate a new set of temporary credentials. Why is this important?
“That way, if a password or access key is compromised without your knowledge, you limit how long the credentials can be used to access your resources.”
Source: https://docs.aws.amazon.com/IAM/latest/UserGuide/best-practices.html#rotate-credentials
How it’s done
So, fine – STS provides temporary credentials, but how does this give the contractor access to your buckets? This is were IAM roles come into play.
“An IAM role is similar to a user in its structure, but rather than it being accessed by a fixed set of credentials it is instead used by assuming the role, which means to request and obtain temporary API credentials that allow taking action with the privileges that are granted to the role.”
Source: https://stackoverflow.com/questions/44623056/terraform-what-does-assumerole-service-ec2-do
Usually a user from another AWS account could of course not assume one of your roles. However, you can edit the role’s trust policy in such a way that it will trust the external user account and allow it to assume the role. Assuming the role in turn will grant the user access to the required resources – in our example to the S3 bucket.
So, let’s summarize what we will do next:
- Create an IAM role in our own AWS account that grants the necessary permissions to access S3 buckets.
- Adjust the role’s trust policy in such a way that it trusts the external contractor’s AWS user from another account and enables him to assume that role.
- Contractor programmatically calls AWS STS to obtain temporary credentials for working with that role in your account and access your buckets.
Create IAM Role
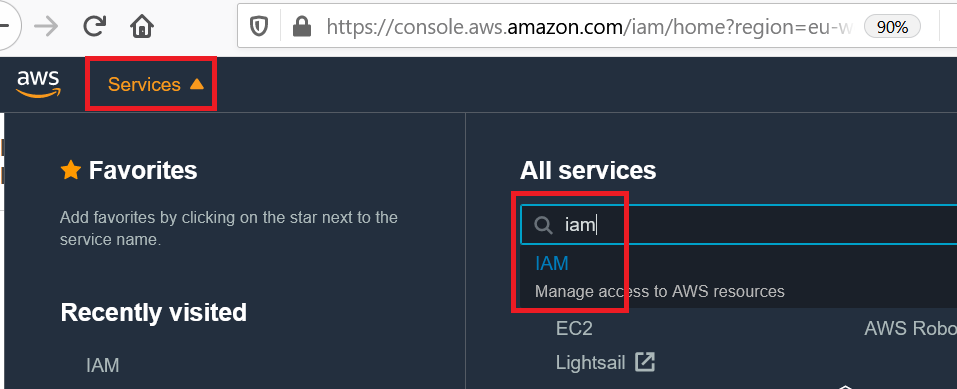
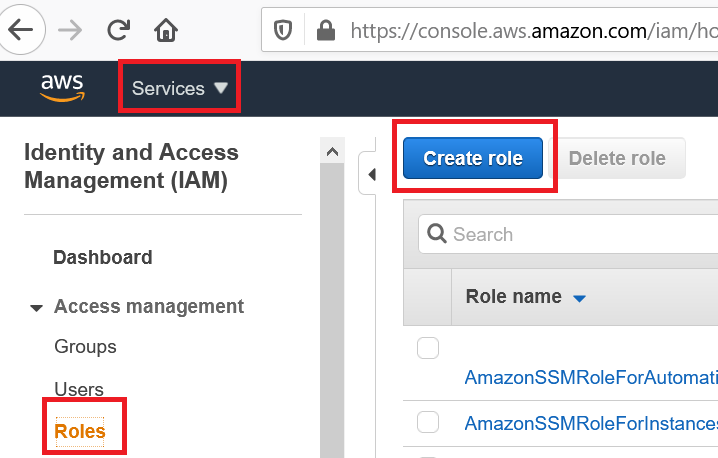
First, we have to create an IAM role that, once assumed, will grant the necessary access to the S3 buckets. Navigating to IAM…
… we create a new role:
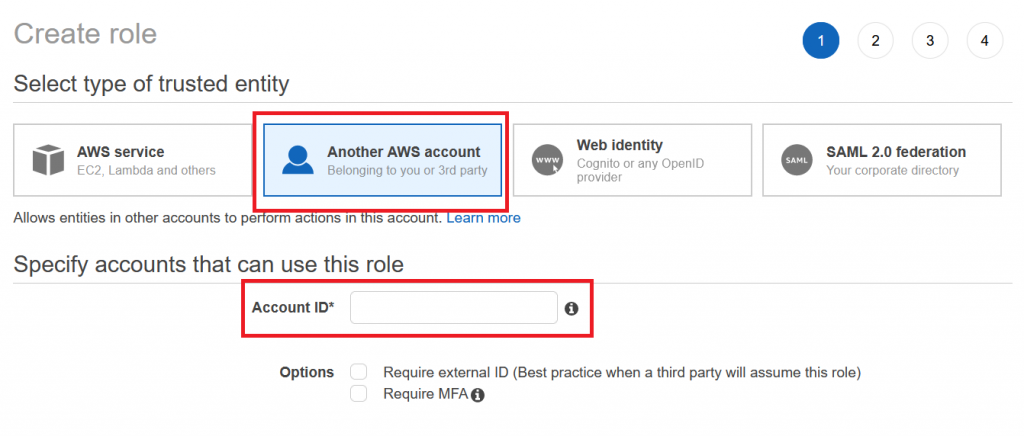
Since your contractor does not have a user account in your AWS environment, we choose the option that users from other accounts will be able to assume the role. You will have to ask your contractor for his AWS Account ID, so that you can indicate it here. The Account ID itself is not considered secret – Amazon explains in this article how to obtain and share it. For testing, you can use your own Account ID:
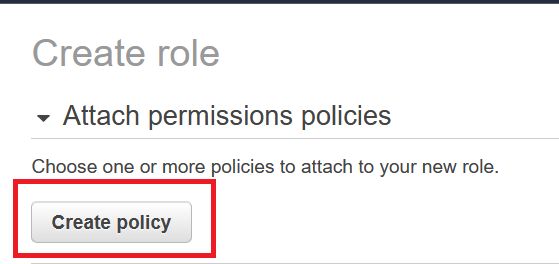
Next, we need to define the permissions that the role will grant to an entity. Please note that it is an AWS IAM security best practice to use AWS Managed Policies (the one with the orange box logo) instead of custom ones to avoid that more and more policies will be created which nobody continuously scrutinizes and maintains:
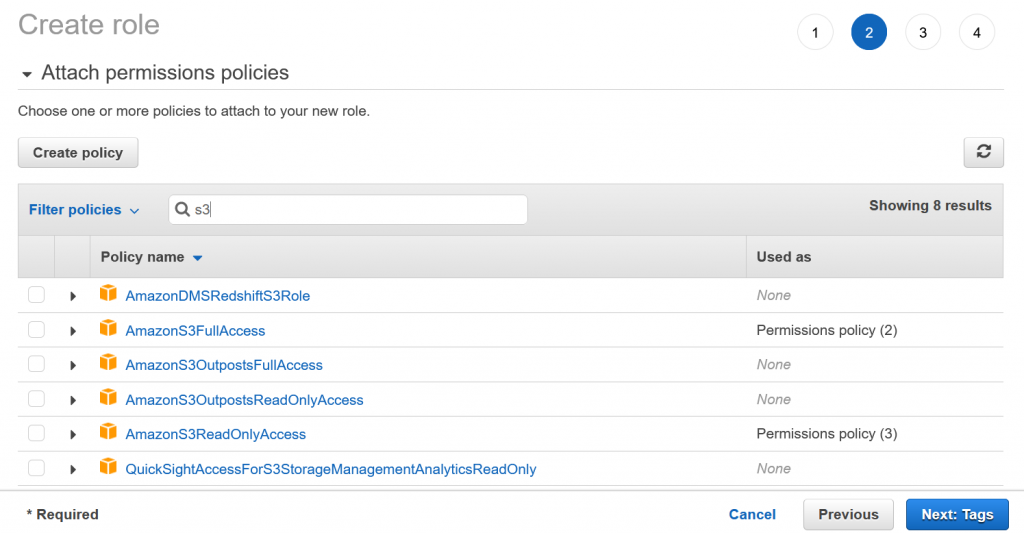
However, for this example we do not use one of the available S3 policies, since we want to grant very specific access rights in this case. Hence, we go with the custom policy:
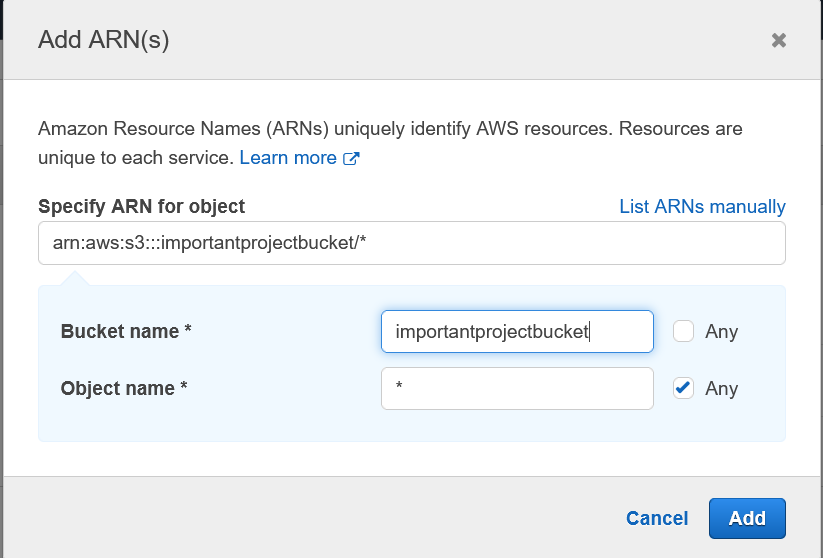
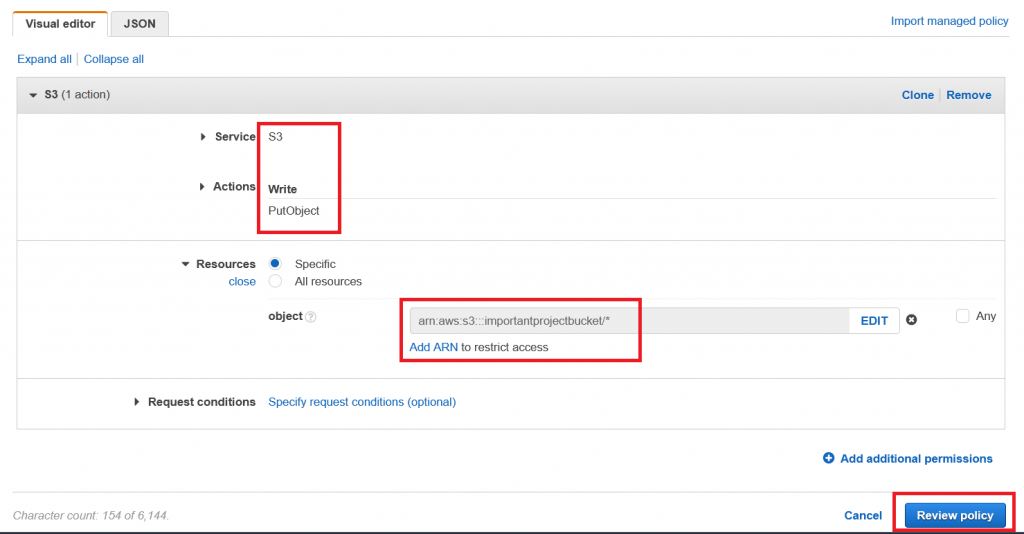
For this example, we select S3 as a service and I indicated that the resource in question is the bucket “importantprojectbucket”. Since buckets need to be globally unique, the name of your bucket will be different. If you want, you can create a new bucket (it can be a private one, i.e. all settings on default) for this example.
We only want to allow the contractor to put objects into the bucket and nothing else, so the overview should now look similar to this:
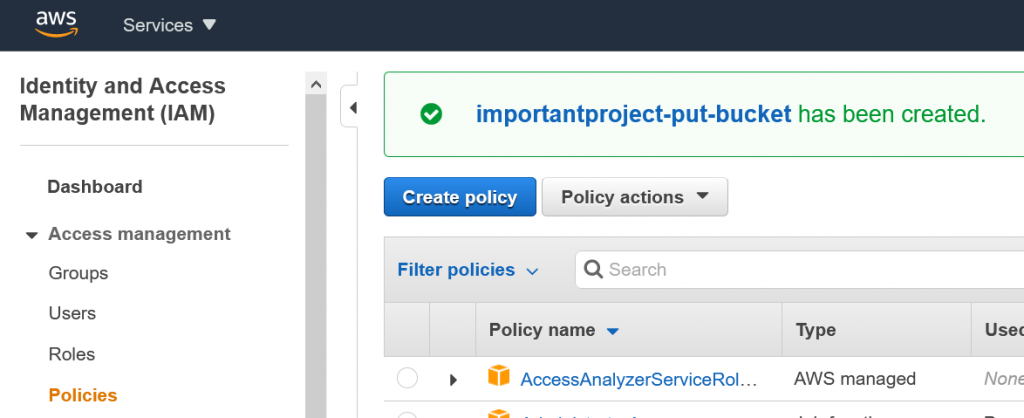
Just adding some meaningful name (for example “importantproject-put-bucket”) and description…

… and our policy was successfully created. Copy that name (in this example “importantproject-put-bucket”)…
… and in our previous browser tab let’s refresh the list of policies and paste the name of the one we just created:
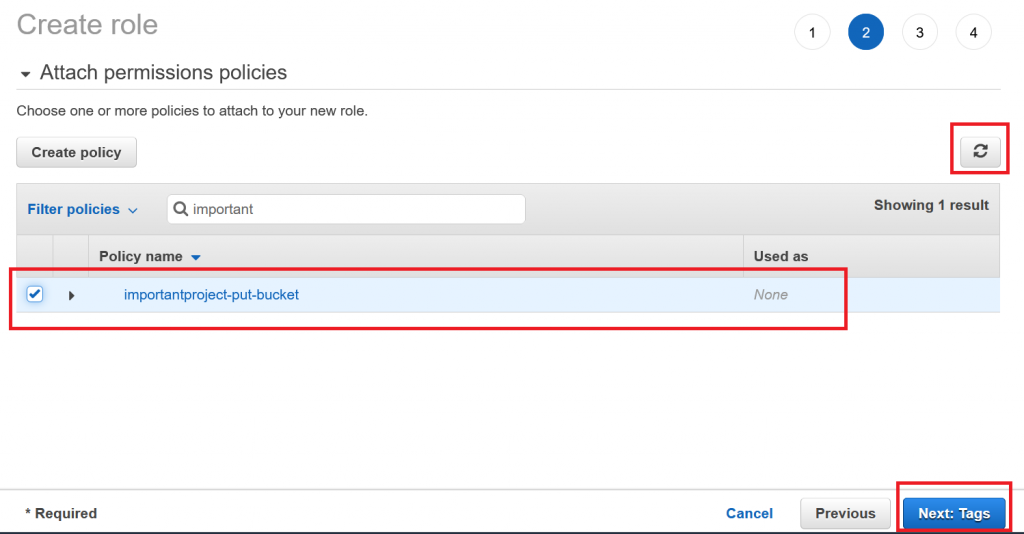
We will not need any tags, so we can skip the next step and finish off by giving our role a name, for example “importantproject-contractorA-bucket-put”:
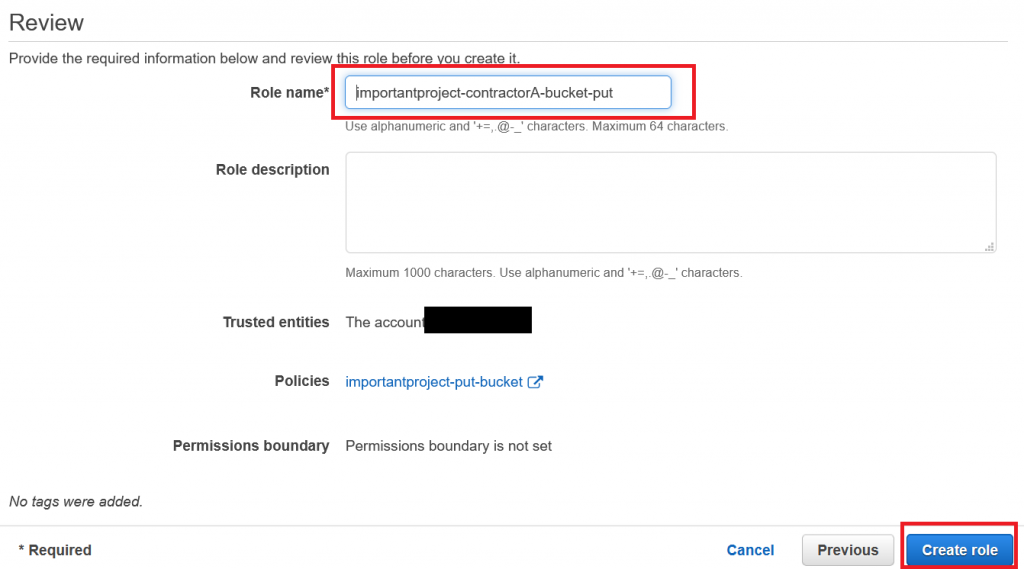
Also do not forget to make a note of the new role’s ARN which you can see on the overview page – we will need to provide it to the contractor later on:

Restrict trust relationship to specific user
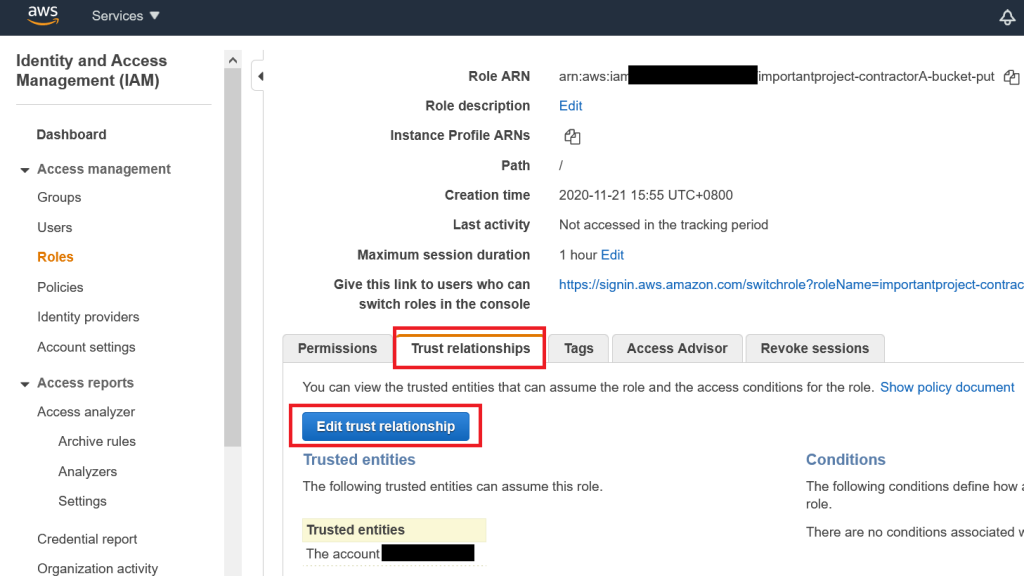
So, now we have our role. However, it is not optimal in the sense of granting least privilege, because it allows anyone with access to your contractor’s AWS account to assume that role. We can verify and change this. Open the role we just created, move to the tab “Trust Relationships” and click on “Edit trust relationship”:
We will see something like this:
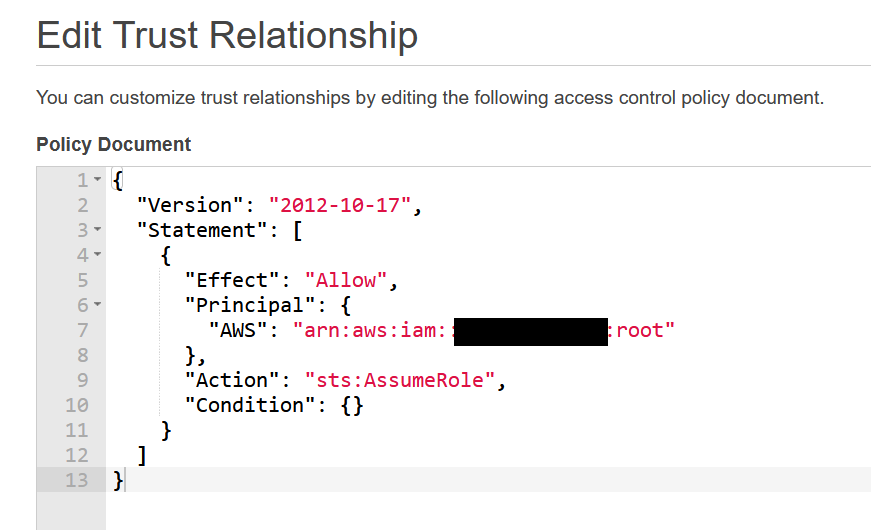
As you can see, our role trusts “root” from the contractor’s account. This does however not refer to your contractor’s most powerful AWS superuser, but instead means that any authenticated and authorized principal in the specified account can assume the role. In other words: Anyone who logs in to the contractor’s AWS environment.
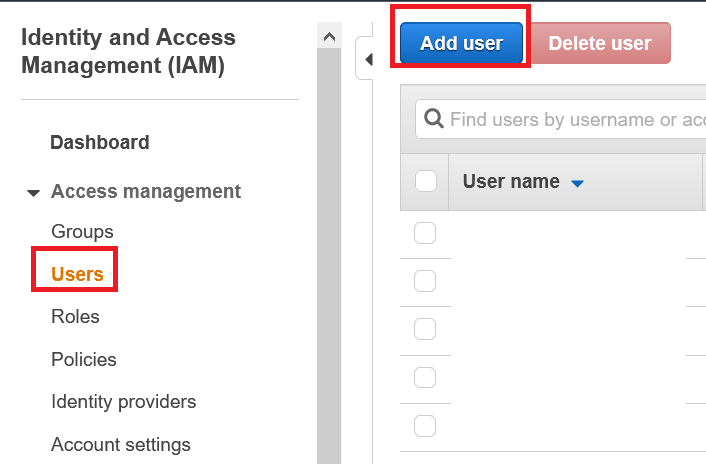
We want to change this so that only our contractor’s employee “Richard” can assume the role. In a real-world scenario you would ask him for his AWS username – if you are working in your own AWS environment without another one at hand, you can quickly create that account by yourself. Back in the IAM console, select “Add user”:
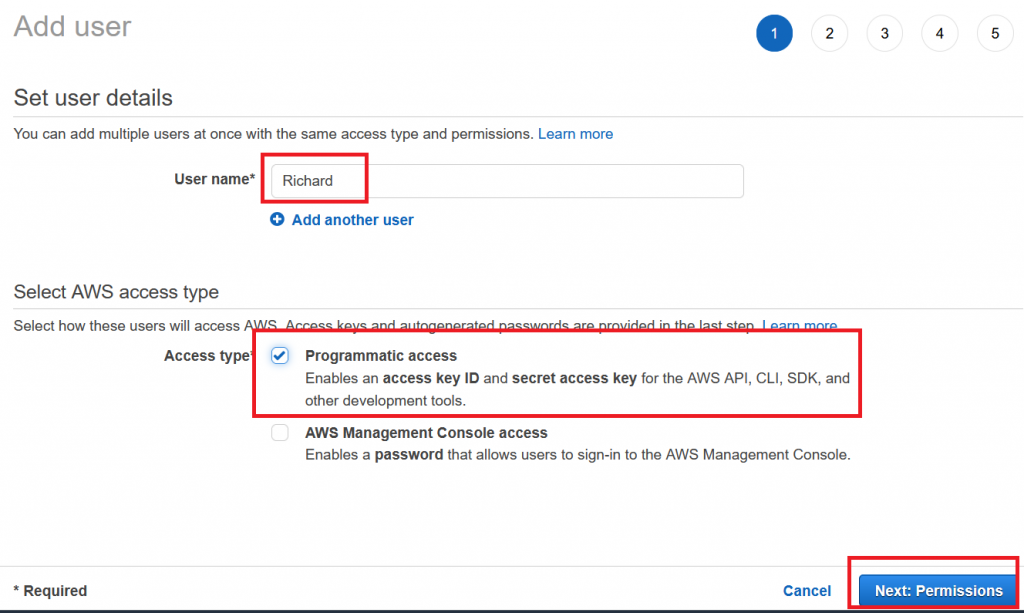
Let’s grant Richard Programmatic Access and continue to the permissions. Richard does not need to have any permissions – especially not for writing into S3 buckets!
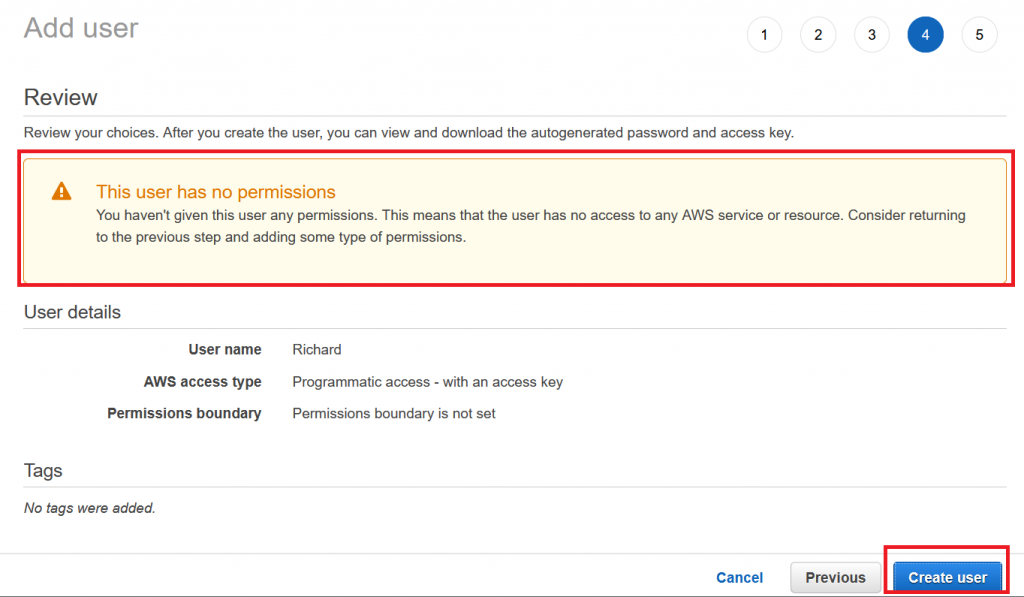
Let’s jump directly to the last overview page without changing anything and click create user. It will warn us that the user does not have any permissions, but that’s ok, because we will solve this with our freshly created role.
Do not forget to write down the credentials for programmatic access to try out our setup later:
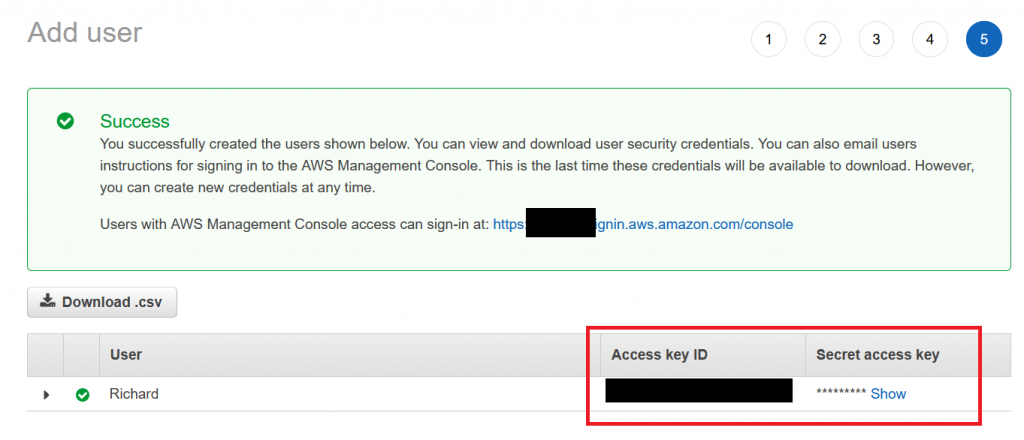
You can save these credentials locally in your default AWS credentials file: ~/.aws/.credentials. You can name the profile for example “importantproject”, so the file should look similar to this:
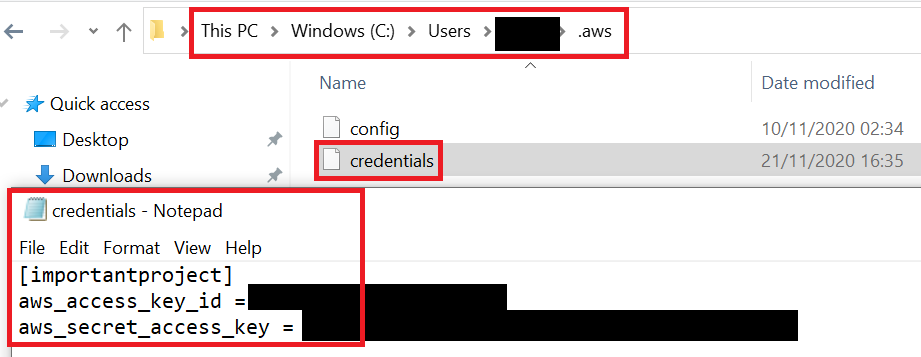
In a real-world scenario this file would be the normal AWS credentials file of your contractor on your contractor’s own computer, of course. For this example, we are basically a bit schizophrenic by playing contractor and customer at once.
Back to our AWS console.
Knowing the username – “Richard” – we can go back to our role’s trust relationship and adjust the JSON accordingly. Again, in a real-world scenario you would enter your contractor’s employee user name:
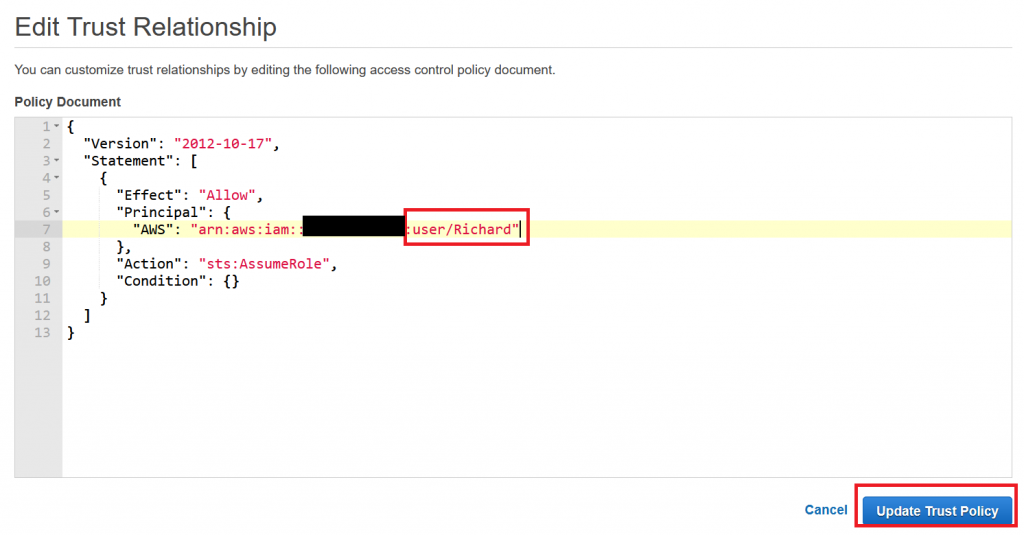
When we now “Update Trust Policy”, only our contractor’s employee Richard (or in our example our local user Richard) will be allowed to assume that role. If you want, you can further adjust the trust policy so that Richard can only assume the role if he used Multi-Factor Authentication, is coming at the agreed date and time, from a specific IP address and much more.
Assume the role programmatically
We are now done with our setup and Richard is ready to make use of his new rights! On his computer, Richard already installed the AWS Tools for Powershell for easy programmatic access.
However, first he simply tries to access the bucket without assuming the role, just by authenticating. Remember that before we put Richard’s credentials in the profile “importantproject”. If you are using another profile, you have to adjust the name. In case you are working with your [default] profile, you can omit the whole -ProfileName parameter.
Since Richard is trying to put an object into another (your) account, he cannot list the buckets from that other account (even if you granted the rights), but he can specify the bucket for cross-account access:
Write-S3Object -ProfileName "importantproject" -BucketName "importantprojectbucket" -File "richardsimportantfile.txt"
If you try this, make sure that in your current directory there is a file that is named accordingly, or otherwise create one. Let’s see what happens:

This doesn’t work!
Well, actually it’s not so surprising, because we did not grant any access rights to our example user. If Richard were the contractor’s employee, your AWS environment would also not know about that guy who is trying to put something into your bucket and block the request.
But remember that we set up a beautiful role? Now it’s the time for using it!
As previously explained, Richard will need to have temporary access to the files and therefore will have to temporarily assume the role we created. He can use the AWS Cmdlet “Use-STSRole” for this:
“Returns a set of temporary security credentials that you can use to access AWS resources that you might not normally have access to.”
Source: https://docs.aws.amazon.com/powershell/latest/reference/items/Use-STSRole.html
Yey, that’s exactly what he needs. Additionally, we already told him the ARN of the role which we created for him (you remembered to write it down, as noted above, right?), so that he can refer to it in his code.
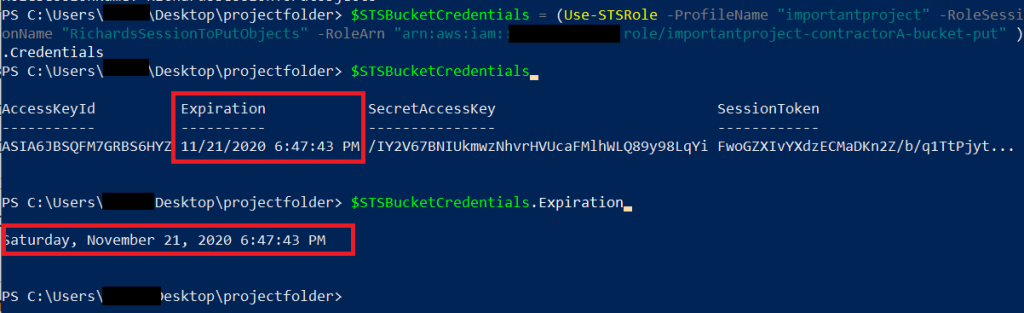
$STSBucketCredentials = (Use-STSRole -ProfileName "importantproject" -RoleSessionName "RichardsSessionToPutObjects" -RoleArn "arn:aws:iam::*YourIDhere*:role/importantproject-contractorA-bucket-put" ).Credentials
With these temporary credentials for our new role that STS provided, Richard can now put objects into the bucket. This works, as long as the credentials are valid and without having to pass any credentials to Richard which later on could be compromised! Richard can check the validity of his credentials and renew them if needed. This will be successful if you do not revoke the trust relationship from the role or the role itself. To check the life time of his newly obtained token, he can simply print out the variable he was using in the command above, or by reading directly the variable “Expiration”:
$STSBucketCredentials.Expiration
If he runs the same command again, both AccessKey and SecretAccessKey will have changed – this is exactly the idea of using STS: Temporary, automatically changing tokens:
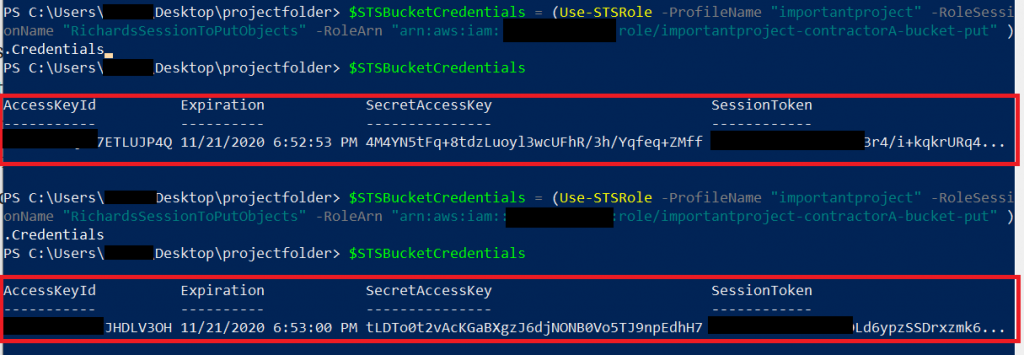
The credentials above are valid for one hour, but their lifetime can be adjusted using the -DurationInSeconds parameter for Use-STSRole.
Now, Richard finally wants to put his important file into the folder, so he is using a similar code as he did above (which resulted in “Access Denied”), but this time with two small adjustments:
- He will omit the -ProfileName parameter, because all necessary information is already in his STS token. Using his profile would result in access denied (as we saw above), because his account – without the role – is not allowed to access the bucket.
- Instead he will be using the freshly created token:
Write-S3Object -BucketName "importantprojectbucket" -File "richardsimportantfile.txt" -Credential $STSBucketCredentials

This time there is no Access Denied error message – looks good!
So, let’s see if the object is actually there by having a look via the AWS Console:
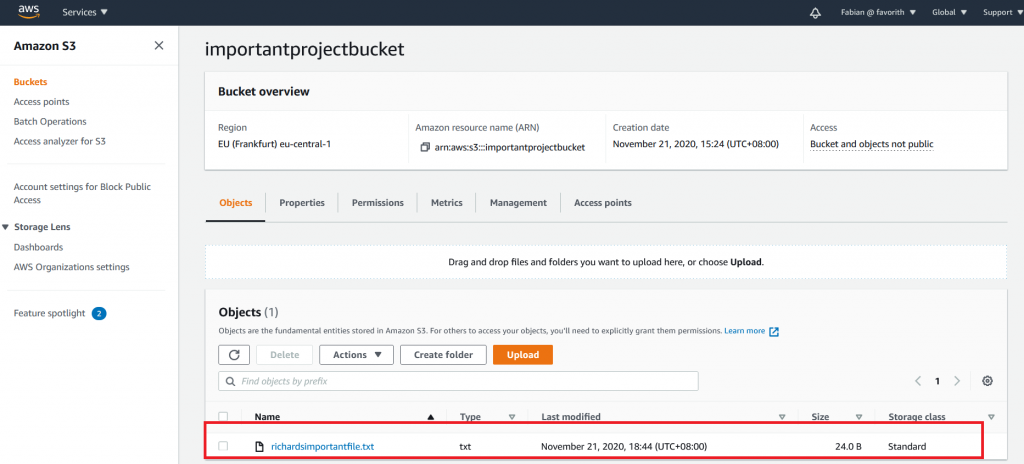
And sure enough – there it is! Success!
One final remark: In our example, Richard is a local user and so “you” with your other user in the same AWS account will have access to the object. If however Richard was indeed coming from another AWS environment, all object rights would by default remain with him.
You can use additional parameters in the policy which we created above to enforce that rights are granted to you. If you are getting “Access Denied” errors despite being certain that your configuration “should work”, check out the troubleshooting tips from AWS on cross-account permissions in general and troubleshooting tips for encrypted bucket operations in particular.