Many people know Suricata as network intrusion detection (IDS) system, i.e. acting on live traffic; many people know NetworkMiner as network forensics tool, i.e. acting on recorded traffic (e.g. in the form of a pcap file). While this is absolutely correct, it’s only part of the story.
Did you know that Suricata has an “offline mode (replay mode)”?
Table of Contents
NetworkMiner, Suricata & Wireshark in combination
Offline mode allows to run all of Suricata’s IDS rules on previously recorded traffic to check for anomalies at any time. This is actually a powerful feature, because you can also re-analyze traffic with new security intelligence and new rules that might not have been available at the time of recording. In a way, it turns in a search-based SIEM – like Splunk or Azure Sentinel – but in an on-demand, run-once fashion (and on more low-level data, namely layer 2 instead of Syslog application events).
So, as the author of NetworkMiner shows in one of his videos analyzing Zyklon trojan traffic, NetworkMiner and Suricata are actually a nice combination: Load the pcap in NetworkMiner to get an overview on what’s happening and first anomalies, let Suricata discover whatever violates the abundant IDS ruleset, have another look into NetworkMiner to drill down on these discoveries – or start up Wireshark to look even deeper.
Well, there is a catch: NetworkMiner is a Windows tool, Suricata was written for Linux.
Recommended setup
Of course, there are many ways how to get software from the respective OS running on the other, not to mention that Windows Subsystem for Linux (WSL) is only getting better. I would nevertheless suggest to run both on Linux. Here’s why:
- Setting up a small-footprint VM with Linux is more straightforward than for Windows and you do not have to worry about licenses.
- You are working with potentially dangerous software (third party pcap files getting read and interpreted; risk of buffer overflows etc.), so using a virtual machine instead of just WSL is most likely a safer choice. For the same reason, I encourage you to set up a Linux VM even if your host is also Linux. Just have that forensics lab properly separated from your production machine.
- NetworkMiner does not require any setup, so you just need to get it running on Linux; Suricata on the other hand requires installation and adjustments, which only get more troublesome when trying to perform them on a non-native platform it was not originally written for.
- Suricata of course does not only offer the abovementioned offline mode, but also “normal” IDS/IPS mode. For capturing live traffic, Linux offers more possibilities to control the network stack.
Which Linux distro to choose? For a quick start, Ubuntu is a good choice, because all the packages can be easily downloaded. The Suricata developer page describes in detail how to download Suricata from the PPA, but here a quick summary:
sudo apt-get install software-properties-common
sudo add-apt-repository ppa:oisf/suricata-stable
sudo apt-get update
sudo apt-get install suricata
sudo apt-get update
sudo apt-get upgrade
All the further steps that are described in Suricata’s Basic Setup page are only necessary if you decide to build the tool from source code – so we do not need it. Now, what the manual does not mention: This process will not install any rules – so you basically have a toothless IDS!
Fortunately, we can fix this very easily:
sudo suricata-update Done – this single command brought us a bunch of default rules. For our purposes, the setup should be fine, but if you consider running Suricata as permanent IDS, remember to adjust the configuration file.
Setting up NetworkMiner on Linux is also very easy. As written before, it does not require any installation, but since it was written for Windows, we will need to ensure that some dependencies are met, using the Mono library. The author of NetworkMiner gives some easy-to-follow instructions on how to set it up, but here is a quick summary specifically for Ubuntu:
sudo apt-get install libmono-system-windows-forms4.0-cil
sudo apt-get install libmono-system-web4.0-cil
sudo apt-get install libmono-system-net4.0-cil
sudo apt-get install libmono-system-runtime-serialization4.0-cil
sudo apt-get install libmono-system-xml-linq4.0-cil
wget https://www.netresec.com/?download=NetworkMiner -O /tmp/nm.zip
sudo unzip /tmp/nm.zip -d /opt/
cd /opt/NetworkMiner*
sudo chmod +x NetworkMiner.exe
sudo chmod -R go+w AssembledFiles/
sudo chmod -R go+w Captures/
Starting up
To run NetworkMiner, you can now just type:
mono NetworkMiner.exe --noupdatecheck You can also create a file “run-networkminer.sh” on your desktop with the following content (remember to make it executable):
mono /opt/NetworkMiner*/NetworkMiner.exe --noupdatecheckFrom now on you can simply run that “script” to open NetworkMiner.
With Suricata it’s similarly easy, just type:
sudo suricata -c /etc/suricata/suricata.yaml -r *path to your pcap file*.pcapThe results of Suricata’s analysis can be found in “fast.log” (if you did not change the name of that file in the Suricata config) in the current directory.
Some tips for quick analysis
I decided to move this section to my next post, to have this present article more focused on the setup. In the next article I then elaborate more in detail on tips for analysis.
Caveats
Two caveats in the described setup:
- Update 28/09/2020: Version 2.6 of NetworkMiner was released on 23rd of September 2020, including a bug fix for the following problem.
Mono seems to have issues with the way NetworkMiner is trying to open files and folders. When you go to the NetworkMiner “Files” tab, rightclick on a file and select “Open File” or “Open Folder”, you might get an error message:
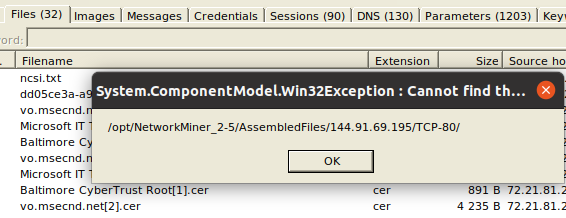
Unfortunately, so far I did not find out how to fix it this. However, I anyway suggest to use NetworkMiner just to get an overview on what’s going on and then to move to other tools to drill down. So, you can for example simply open Wireshark, select File > Export Objects > HTTP… (or any other) and then extract the file from the pcap:
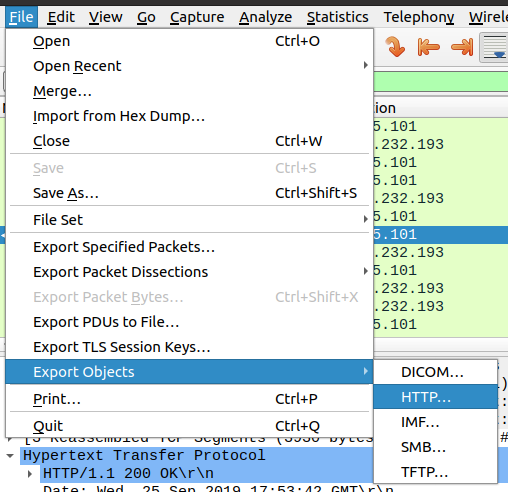
This being said, NetworkMiner does export the files and they end up on your hard disk, so if you do not want to use Wireshark, you can still use any file explorer of your choice to manually navigate to the extracted files! The error message shown above reveals the path where you would want to browse to.
- When I performed the same test as shown in the NetworkMiner video on the Zyklon Trojan, I actually did not get the same results. I reached out to the author to ask which Suricata ruleset they had used for the test. If I get a response, I will update this post. In every case this illustrates how important it is to work with the proper rules for the respective case. And it also shows how useful this Suricata “offline mode” is – because you can just reanalyze your findings with yet another ruleset.
Happy hunting!